Conway's Webcam of Life: HTML5 Canvas, Webcam, and Video Effects
Difficulty level: Beginner to Intermediate Languages: HTML, Javascript
This post covers the inner workings of Conway’s Webcam of Life. Check it out if you haven’t already.
The code is available here.
For the sake of simplicity, the entire project was written without any external libraries – just good ol’ Javascript (cringe).
Introduction
Conways Game of Life “is a cellular automaton devised by the British mathematician John Horton Conway in 1970.” Yep, I’m quoting wikipedia.
There are a lot of implementations of Conway’s Game of Life out there. I’d originally started by writing an implementation in Golang, and afterwards found a more graceful implementation here.
To me, what makes Conway’s Game of Life interesting is the initial state – and so Conway’s Webcam of Life was born.💡
Content of this post
There are already so many implementations of Conway’s Game of Life out there that I’m not going to spend any time explaining mine. The code is on github if you’re interested. Instead, I’m mostly going to dive into some of the video/canvas tricks that went into the project.
How it works (aka the TLDR):
Get video feed from a webcam
Attach that video feed onto an HTML canvas object
Apply effects to the canvas context (like pixelation)
When the start button is clicked, pause the video.
Convert the current state of the canvas into an array of booleans (black = true, white = false)
Feed that array into a conway’s game of life implemention
Convert the output of the conway implementation (the next life cycle; an array of booleans) back into pixel values and render it on the canvas.
Repeat steps 6 & 7.
Accessing the webcam with javascript
There are a lot of better tutorials/documentation out there so I’ll mostly cover the most basic case. If you’d like to go straight to the final code, link here
The Web API has gone through a couple changes, so depending on what tutorial you’re following the might be using Navigator.getUserMedia(), which has since been depricated in favor of MediaDevices. I’d recommend using this polyfill to accommodate older browsers.
<!-- HTML -->
<video autoplay></video>
// Javascript
navigator.mediaDevices.getUserMedia({
    video: {
      width:     ...,
      height:    ...,
      frameRate: ...
    }
  }
).then(function(stream) {
  let video = document.querySelector('video');
  video.srcObject = stream;
  video.onloadedmetadata = function(e) {
    video.play();
  };
}).catch(function(err) {
  // deal with an error (such as no webcam)
});


video.addEventListener('play', function() {
  // trigger business logic
}, false);
MediaDevices support a list of properties that you can customize such as width, height, frame rate, aspect ratio, etc.. Start with the official w3c documention for more details.
In my experience, it’s better to keep the video stream simple, do any complex image manipuation on a canvas object. You’ll find yourself hitting your head against the wall trying to manipulate the video directly.
Drawing video onto a canvas
Capturing webcam stream and putting it on a canvas is actually quite straight forward. Assuming that you have an HTML canvas object that’s been instantiated with width and height, then the drawImage method can be used on a canvas’ context. A good place to capture the video is in that ‘play’ event listener from above.
<!-- HTML -->
<video autoplay></video>
<canvas></canvas>
  //javascript
  var canvas = document.querySelector('canvas');
  canvas.width  = ...;
  canvas.height = ...;

  var context = canvas.getContext('2d');

  context.drawImage(video, 0, 0, canvas.width, canvas.height);

  // video 'play' event listener
  video.addEventListener('play', function() {
    context.drawImage(this, 0, 0, canvas.width, canvas.height);
  }, false);
The above code works, but will only capture the video once – like a snapshot. You’ll want something recursive that’ll recapture the video at a frame rate, such as:
  function draw(video, canvas, context, frameRate) {
    context.drawImage(video, 0, 0, canvas.width, canvas.height);

    setTimeout(draw, 1/frameRate, video, canvas, context, frameRate);
  }
Pixelating a canvas
Principle: the trick for pixelating a canvas is to scale the canvas to a smaller size, then scale it back up again.
Dig it:
function.pixelate(image, canvas, context, pixelSize) {
  let wScaled, hScaled, scale;

  scale = 1/pixelSize;
  wScaled = canvas.width*scale;
  hScaled = canvas.height*scale;

  context.drawImage(image, 0, 0, wScaled, hScaled);
  context.mozImageSmoothingEnabled = false;
  context.imageSmoothingEnabled = false;
  context.drawImage(canvas, 0, 0, wScaled, hScaled, 0, 0, canvas.width, canvas.height);
}
In this case, pass video in as the image.
![]()
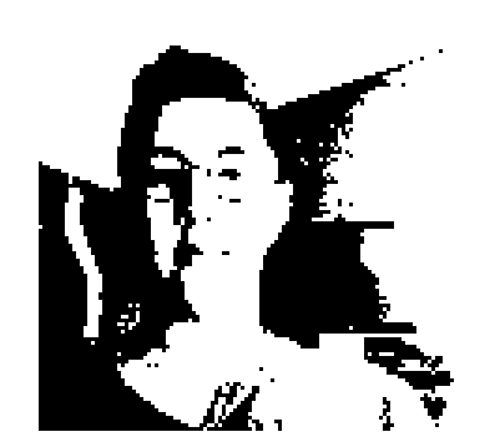
Threshold effect (black and white)
I mostly bring this one up as a plug for how easy it is to manipulate individual canvas pixels.
Principle: take an average of red, green, and blue pixel values and render them white if above a certain threshold and black if below.
function(context, threshold, width, height) {
    let image, data, r, g, b, color;

    image = context.getImageData(0, 0, width, height);

    data = image.data;

    for (let i = 0; i< data.length; i = i+4) {
      r = data[i];
      g = data[i+1];
      b = data[i+2];

      if ((r + b + g) / 3 < threshold) {
        color = 0; // black
      } else {
        color = 255; // white
      }

      data[i] = data[i+1] = data[i+2] = color;
    }

    image.data = data;

    context.putImageData(image, 0, 0);
  }
Pixels are accessible through the data property. They can be treated in increments of 4: red, green, blue, and alpha. In this example I’m leaving alpha alone.
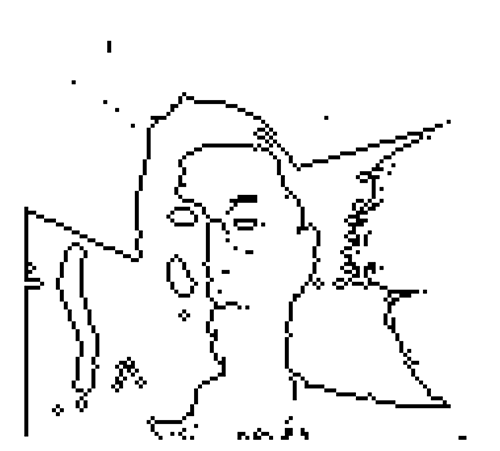
Wireframe effect
This effect removes the fill from inside shapes creating a faux wireframe effect.
Principle: If a pixel has neighbours above, below, left, and right, then it can be considered to be inside a shape and can be rendered white.
The code for this one is actually quite long, so I’ll just link to it here.
Canvas to conway and back again
The missing piece to the puzzle is getting from an HTML canvas object to an implementation of Conway’s Game of Life. Then doing the reverse once you’ve calculated the next life cycle.
To handle that bridge, I wrote a canvas conway engine, which I’ll link to here.
Conclusion
This was a fun project I hope you enjoy it. Let me know if you have any questions.